Tuesday, February 16, 2010

Posting from Emacs using gblogger

I've been playing with Emacs lately. The MO of Emacs is to avoid leaving it any more than absolutely necessary, so there are packages for doing all kinds of stuff. One of those things is posting to blogger. It didn't take too long to find this article introducing g-client, which can be downloaded from google here. Downloading and installing it were relatively painless, except that you need to run make config before make to avoid errors about missing g-cus-load.el. The hard part was figuring out, for someone who didn't "just know", what the "post url" was. So here's how you figure it out. Run gblogger-blogs and view the resulting page (for me it just opened in my browser) - it should be a plain text page with a handful of links. At the bottom of the page is a link "[post]". Right click and copy the address for that - that's the "post url". Having that, I of course started hacking my .emacs.el:

(defun dts-new-blog-post ()
(interactive)
(gblogger-new-entry "http://www.blogger.com/feeds/7785890353048895648/posts/default"))
and mapped it to C-c C-b.

BTW 1 - It was super easy to copy and paste the code from my .emacs.el, since it was open in another buffer.

BTW 2 - In writing this I found the following two commands really useful:

w3m-print-current-url
Prints the url of the current page in the minibuffer, but, possibly more useful, copies it to the kill-ring.
w3m-print-this-url
Same as above, but for the currently hilighted link.

BTW 3 - When trying to post this it complained that I had an HTML error and I freaked a little about getting my post back, but all I had to do was undo a couple times (C-x u).

BTW 4 - I went back and edited this post to remove some extra blank lines. Unlike normal HTML, they seem to matter here and were producing MEGA spacing.

Test post from Emacs


This is a test post from Emacs.

Tuesday, January 12, 2010

Random Update - New Camera Gear

So I saved up some birthday and Christmas money and got a couple new items of camera gear. I got the Nikkor 50 mm f/1.8, which for less than $150 is really a no-brainer. It's super sharp and fast (there's a reason they call it the "nifty fifty"). I like it a lot. I also picked up Manfrotto 190XB tripod legs and a 484rc2 quick release head. It's not the biggest tripod but that was kind of the point - I want to be able to tote it around hiking or throw it in luggage for traveling. I haven't had any problems at all with stability or supporting my gear.

I took this shot using the tripod at Core Creek County Park here in Newtown. I was driving home and noticed the incredible sunset happening but didn't have my gear so I rushed into the apartment, grabbed everything, and flew back to the east side of the lake. I think I was a little past the best light but I think the shot came out pretty well. I used my 18-55 at 18mm, f/3.5 for 1/2 second. In retrospect I think I could have stopped down a little for more sharpness and depth, but not bad for a first try. I didn't have to do much in post, I think I lightened the lake and darkened the sky slightly and darkened the blacks in the middle. The lake was partially frozen.


Wednesday, October 14, 2009

Convert Keynote / iWork 2009 to 2008

If you're like me, you tried Keynote 2009 and - while Keynote continues to be a superior presentation tool - decided that it wasn't worth the cost of upgrading. If you're even more like me, you created at least one presentation in Keynote 2009 during the trial (or converted a Keynote 2008 presentation to Keynote 2009 and tweaked it a bit), and were then quite dismayed to find that you could not open the Keynote 2009 file in Keynote 2008 at all. This is a big problem after the trial runs out - it leaves you with presentation material you can't recover!

The Keynote 2008 "file format" is really a directory structure. That is, each .key file is really a directory containing the information that Keynote uses to reconstruct the presentation. In Keynote 2009 this changed to a "flat file" format - they .key file really is a single file. Investigation reveals pretty quickly that the contents of that file are quite similar to the contents of the 2008 directory. A post by linux4research cleared this up - the 2009 format is actually a zipped archive! So half the battle is to simply rename the .key file to a .zip file, unzip it, then rename the unzipped folder with a .key extension. This still won't open in Keynote 2008, though. Luckily the other half of the battle is equally as simple. In they .key folder, open the file index.apxl, find the string key:version= followed by a quoted string that is probably something like 92008xxxxxx. Replace the number with 72007061400.

Anyways, here is a shell script that automates this process. I haven't tested it too extensively, but the basic idea should work. I haven't had experience with other iWork '09 programs (Pages, Numbers), but reportedly the differences are essentially the same, so it may work with them as well if you replace "key" with the proper extension.

#!/bin/bash
# Dan Swain dan.t.swain at gmail.com 10/14/09

# Bash script to convert Keynote 2009 format to Keynote 2008.
#
# Many thanks to linux4research's blog post
# http://linux4research.blogspot.com/ (continued next line)
# (continued url) 2009/09/mac-keynote-2009-format.html
# for the .key to .zip step.

# input argument handling: DISABLED - I don't trust it enough
# not to erase your keynote file on accident...
# if -k is given as first argument, keep the original file
# and the output has "2008" added before .key
# otherwise the original file is overwritten (may be desirable
# because keynote files tend to be LARGE)
# if [ $# -ge 2 ] # note we may throw away extra arguments
# then
# if [ "$1" = "-k" ]
# then
# INPUT=$2
# KEEP=1
# else
# echo "Unknown argument $1, use -k to keep original file."
# exit
# fi
# else
# INPUT=$1
# KEEP=0
# fi

# safe input handling - need at least one argument
if [ $# -ne 1 ]
then
echo "Only one input argument allowed."
exit
fi
INPUT=$1
KEEP=1

# basename doesn't work for keynote files...
BASE=${INPUT%.key}
ZIPFILE=$BASE".zip"

if [ $KEEP -eq 1 ]
then
# output filename
OUTPUT=$BASE
OUTPUT=$OUTPUT" 2008.key"
# copy/rename to zipfile
echo "Copying $INPUT to $ZIPFILE, this may take a moment.."
cp $INPUT $ZIPFILE
echo "Done."
else
# output filename
OUTPUT=$INPUT
# rename to zipfile
mv $INPUT $ZIPFILE
fi

# unzip
echo "Unzipping $ZIPFILE."
unzip $ZIPFILE -d "$OUTPUT"
# erase the zipfile
echo "Erasing $ZIPFILE."
rm $ZIPFILE
# change the version number in the index file
echo "Converting version string to 2008."
INDEXAPXL=$OUTPUT/index.apxl
sed -i '' 's/version=\"[0-9]*/version=\"72007061400/g' "$INDEXAPXL"

Wednesday, September 16, 2009

Shell Script To List XCode Target Source Files

I develop a lot of c++ code on my mac for cross-platform applications, and I've often wanted a convenient way to export a list of source files belonging to a given target in an XCode project. That way when one of my colleagues wants to create a new project on another platform (e.g. Visual Studio or makefile) I can tell them which subset of the source tree to compile for a given application. I've looked several times for a solution but never had any luck. So finally last night I did what any programmer would do and I wrote my own shell script to parse this information out of the XCode pbxproj file.

I'm sharing it here because I'm not sure where else to post it, so if anyone has any suggestions let me know. I also had to learn a bit about awk and sed and I'm not a bash programmer by trade so I'm sure there is a more efficient/elegant/obfuscated way to do this - if anyone has suggestions please do share.

The pbxproj file is coded by long hex codes - so the trick was to find the section of the file that defines the names of the targets, then work forwards from there using the hex codes to find the right lines of the file and figuring out the right awk/sed commands to parse out the relevant information.

I've only tested this with XCode 3.1.3 and with only a single project, so I don't know how robust it is. It's at least a start. Thanks to http://formatmysourcecode.blogspot.com/ for their quick source code formatter.

#!/bin/bash

# Dan Swain dan.t.swain at gmail.com 9/15/09

# Bash script to list the source files that are compiled for each target
# in an xcode project file.
# If an argument is specified, it is taken to be the name of the
# xcode project - the program looks for argument.xcodeproj/project.pbxproj
# If no argument is specified, the program searches for a .xcodeproject
# directory in the current directory. This probably won't work
# if there is more than one .xcodeproj directory.

# given the name of the project, this is the location of the project file
if [ $1 ]
then
PBXFILE=$1.xcodeproj/project.pbxproj
else
XCODEPROJ=`find . -name '*.xcodeproj'`
PBXFILE=$XCODEPROJ/project.pbxproj
fi

# finds the lines defining the names of the targets
LINES=`sed -n '/isa = PBXNativeTarget/=' $PBXFILE`

# for each target
for LINE in $LINES
do
# the target name is on the previous line and is the second field
# delimited by *'s, we also remove a leading and trailing space
TARGETNAME=`awk 'NR=='$((LINE-1)) $PBXFILE | awk -F\* '{print $2}' | sed 's/^[ ]//;s/[ ]$//'`

echo
echo Source Files for Target $TARGETNAME:
echo ====================================

# this is the hex code corresponding to the sources for this target
SOURCES=`awk 'NR=='$((LINE+4)) $PBXFILE | awk '{print $1}'`

# find the line numbers containing the hex code for the sources
SOURCESLINE=`sed -n '/'$SOURCES'/=' $PBXFILE`
# there are two of these, so this leaves us with just the last one
for SL in $SOURCESLINE
do
: # just want the last one
done

# the first file is 4 lines below this
SL=$((SL+4))
# loop over the subsequent lines until the awk command fails
OK=0
while [ "$OK" = "0" ]
do
# the source file is the third field
FILE=`awk 'NR=='$SL $PBXFILE | awk '{print $3}'`
if [ $FILE ]
then
echo $FILE
else
OK=1
fi
# next line
SL=$((SL+1))
done
done

Friday, June 26, 2009

Recalling a day of our trip to SF


Posted
Originally uploaded by m0nstr42
Picture taken somewhere on Haight Street, San Francisco. I remember taking it around the time we were searching for Janis Joplin's house on Lyon Street, so I guess that makes it Upper Haight still, but the lower end? We walked all the way from the MUNI stop at Carl & Stanyan down the full length of Haight to Market Street, had lunch at a place called Cafe Trieste, and rode the F trolley all the way back around to the end of Fisherman's wharf. It was the first sunny day we'd had so we wanted to catch some views of the Golden Gate Bridge from the pier at the Maritime Park. It turned out to still be pretty hazy, so while we could *see* the bridge none of my photos came out all that well. We saw plenty of the bridge the next day, trust me.

Thursday, March 5, 2009

New Camera!

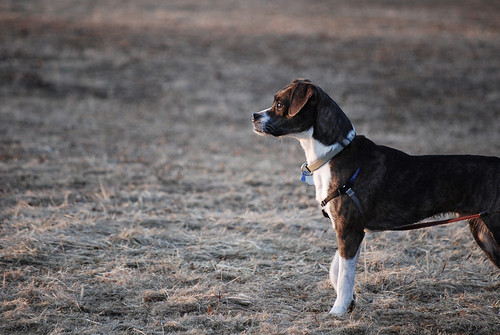
I'm the proud new owner of a Nikon D80 DSLR!  Or at least I was a month or so ago when I got it.  I don't update this very often, just when the mood strikes.  Anyways, I had been scoping DSLRs out for a couple months and decided to finally go for it (permission from my wife to spend a bunch of money was also key).  I picked up the D80 with two lenses; 18-55 mm f/3.5-5.6 VR and 55-200mm f/4-5.6 VR Nikkors.  I love it!  I take way too many pictures of our dog, but he's just so photogenic. Here's an example to commemorate the event.  I took this on the day I got the camera; we took Jack and went to Core Creek Park here in Newtown.  It was late afternoon, which is a great time to take pictures.  This is one of my favorite pictures I've taken so far with the new camera.